I love chairs! If I could have it my way, I would skip the sofa and have a living room full of chairs. For some reason which I can’t explain they hold sentimental meaning that no other of my furniture has. Don’t get me wrong, I love all furniture, but chairs are different. My first chair, that was my very own, belonged to my grandpa Skip. It’s a brown chair with caning and a mustard yellow velvet seat and back. Now I can admit that it’s probably super ugly, but I just remember running my hands over the velvet when I was a child and being fascinated by the weave of the caning. It is still in my old bedroom at my parent’s house, and every so often my mom hints at me taking it back…and one of these days I will.
Anyway, long story short, I have been combining my love of chairs and passion for furniture refinishing, and doing some old fashioned re upholstery. Last year I signed up for my second re upholstery class where we each brought in a chair, and for 3 weeks were taught the steps in transforming it from “EWW!” to “AHH!”
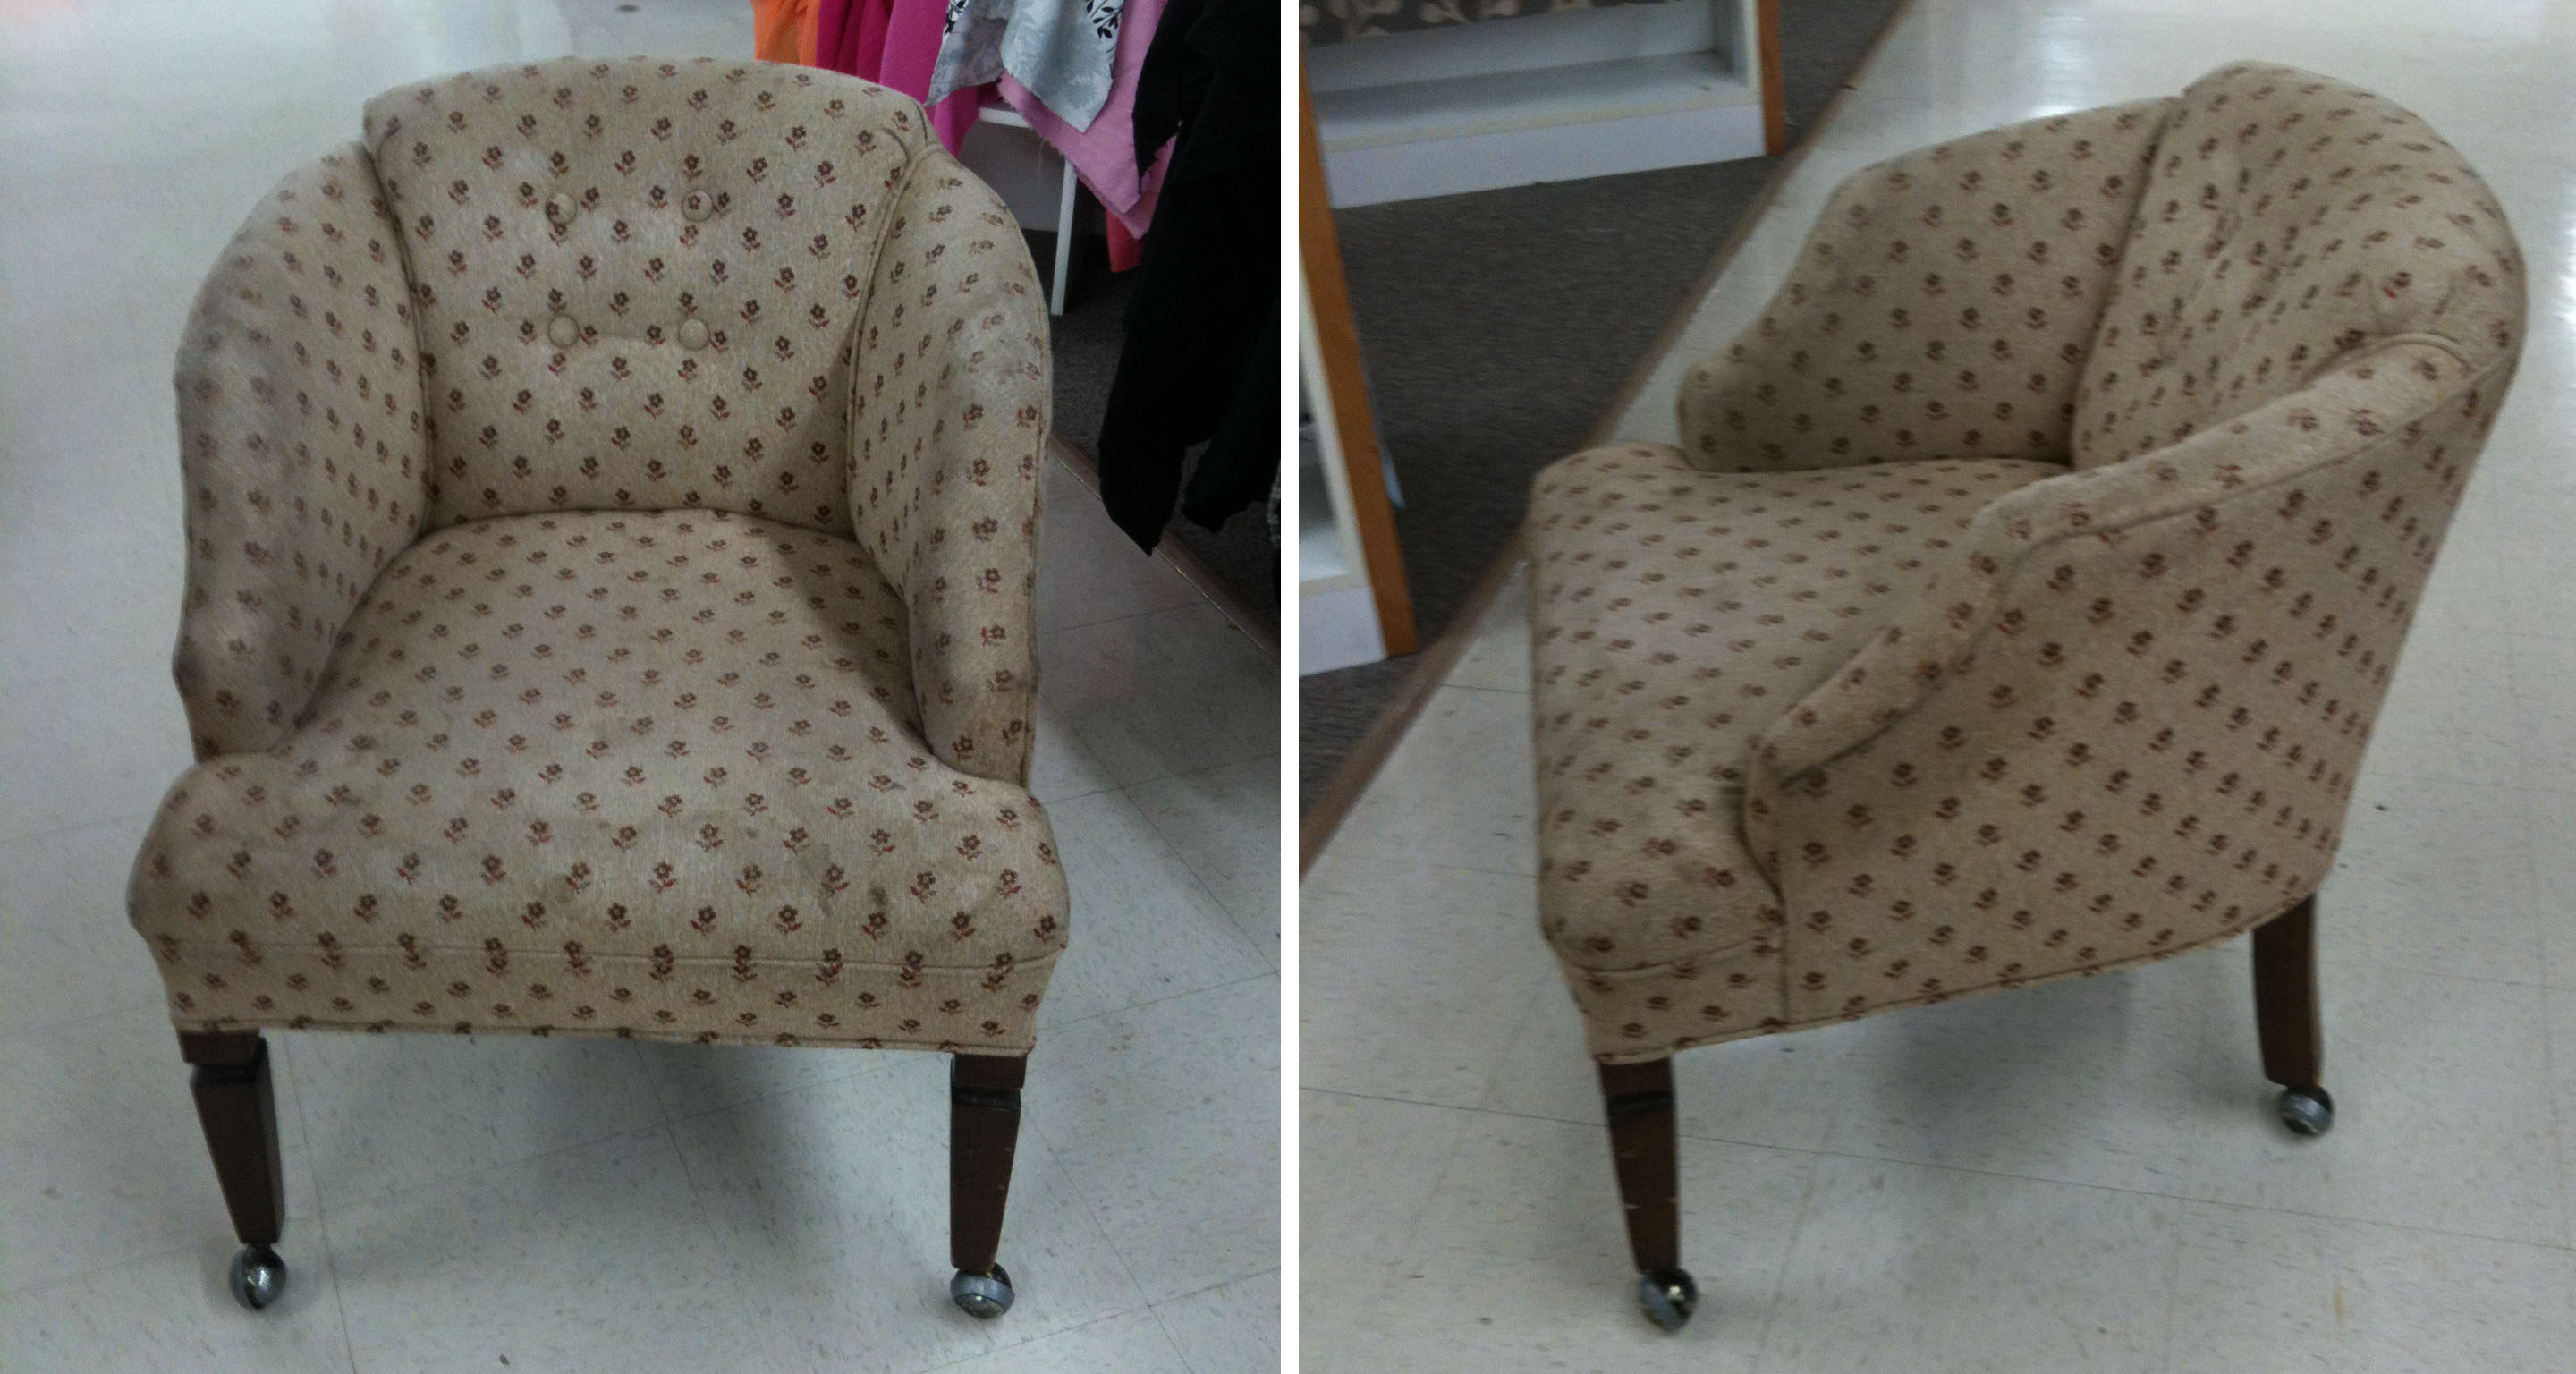
This was my $2.99 goodwill find! I was thrilled to find something with buttons as well piping along the arms. My last chair didn’t have any buttons or piping and it was a new technique I was dying to learn.

Now at this point I will warn you. There are A LOT of photos! And a lot of wording! I took pictures all along the way, mainly so that I could remember all the steps in case I get stuck doing it on my own. So if you just want the before and after scroll to the bottom, but I recommend the process photos!

I started by removing the back fabric of the chair. I was careful when removing any of the pieces, so that I could use them as patterns for cutting out and assembling the new ones. The back piece in particular consisted of 3 panels sewn together so it was very important to get the seam correct. I didn’t want to end up with a crooked backside. I decided for my new chair I wanted to add an additional line of piping along the arm of the chair. Because it wasn’t the original style I didn’t have a piece of fabric to use as a pattern. Instead, in photo #3, I marked where I’d like the piping to go. The little cross lines were used as markers to line the top and side of the arms, seen in photo #6. I sewed the piping onto the top face of the arm and then sewed it to the side panel, in photos #8 and #9. It was much easier to sew the piping in a straight line onto the top panel and then sew it on to the curved side.

After sewing together the arms for both sides, I moved on to removing the seat cushion. The cushion wasn’t in bad shape but the batting and stuffing was definitely thrown out. I stapled a new layer of burlap over the springs to help keep them in place and prevent them from popping through. In photos #14 and #15, I lightly tacked the arms into place while I worked on the seat. After the burlap layer, I put the foam back into place and added stuffing for additional comfort, and also to hid where the old button indents were. I know my photos skip steps, but photo #17 is the piping sewn to the back cushion panel and #18 is the back cushion set into place.

Things were coming together nicely. All of my pattern pieces were cut out and assembled. Next was securing them into place! In photo #20 after stapling down the seat, I did the front panel. I think this was my favorite because it was a total no brainer. There were no fancy curves, just a straight line! And I got to use cardboard strip to keep it straight! I used a layer of batting to keep it looking smooth and then stapled it to the underside of the chair. In photo #23 and#24, I tightly stapled the arm panels. The arm panel was stapled over the top curve to be hidden by the back piece, and then pulled down behind the seat to the back and stapled to the wood. (I’m sorry, I don’t know how to describe it in words) I then put the foam and batting over the back piece and attached the back cushion.
This was about the end of my 3 week class. I scrambled to get my chair as close to done as possible that I completely missed photos of stapling on the back cushion as well as doing the buttons. The trickiest part that I remember was how to tie the button knot on the under side of the seat, but I suppose that most any knot would do. This class was in November so the holiday hype soon followed and my poor half finished chair sat in the garage for months and months. I’m embarrassed to say that it sat for 8 months until last weekend when I decided I would just go for it. Well really, I just want to buy new fabric and recover a new chair, but I made myself promise that I wouldn’t start a new project without finishing this one. So I did it! And to my surprise after 8 months, it only took me 3 hours to finish!

The black piping had already been stapled to about half of the top/back curve so I just had to complete that and run it back down the front. In photo #30 I covered the back with burlap, and then with batting in #31. Next step, I had to use pli-grip which is a strip of metal with little clips that hold the fabric into place. It’s a great tool but unfortunately I didn’t get the best quality stapler and it had some difficulty getting through the metal. This was really the trickiest part because then I had to line up the back piece over the pli-grip and push the fabric into the little claws. Once it was all lined up and held into place, I pushed all the little claws closed which held the fabric tight against the piping. Then I pulled the back fabric underneath of the chair and secured to the underside. This was the home stretch! Next was just the finishing touch of stapling the last of the piping to the bottom edge helping to polish it off. And then there is the very last step of putting on the dust over the bottom area to cover the springs.
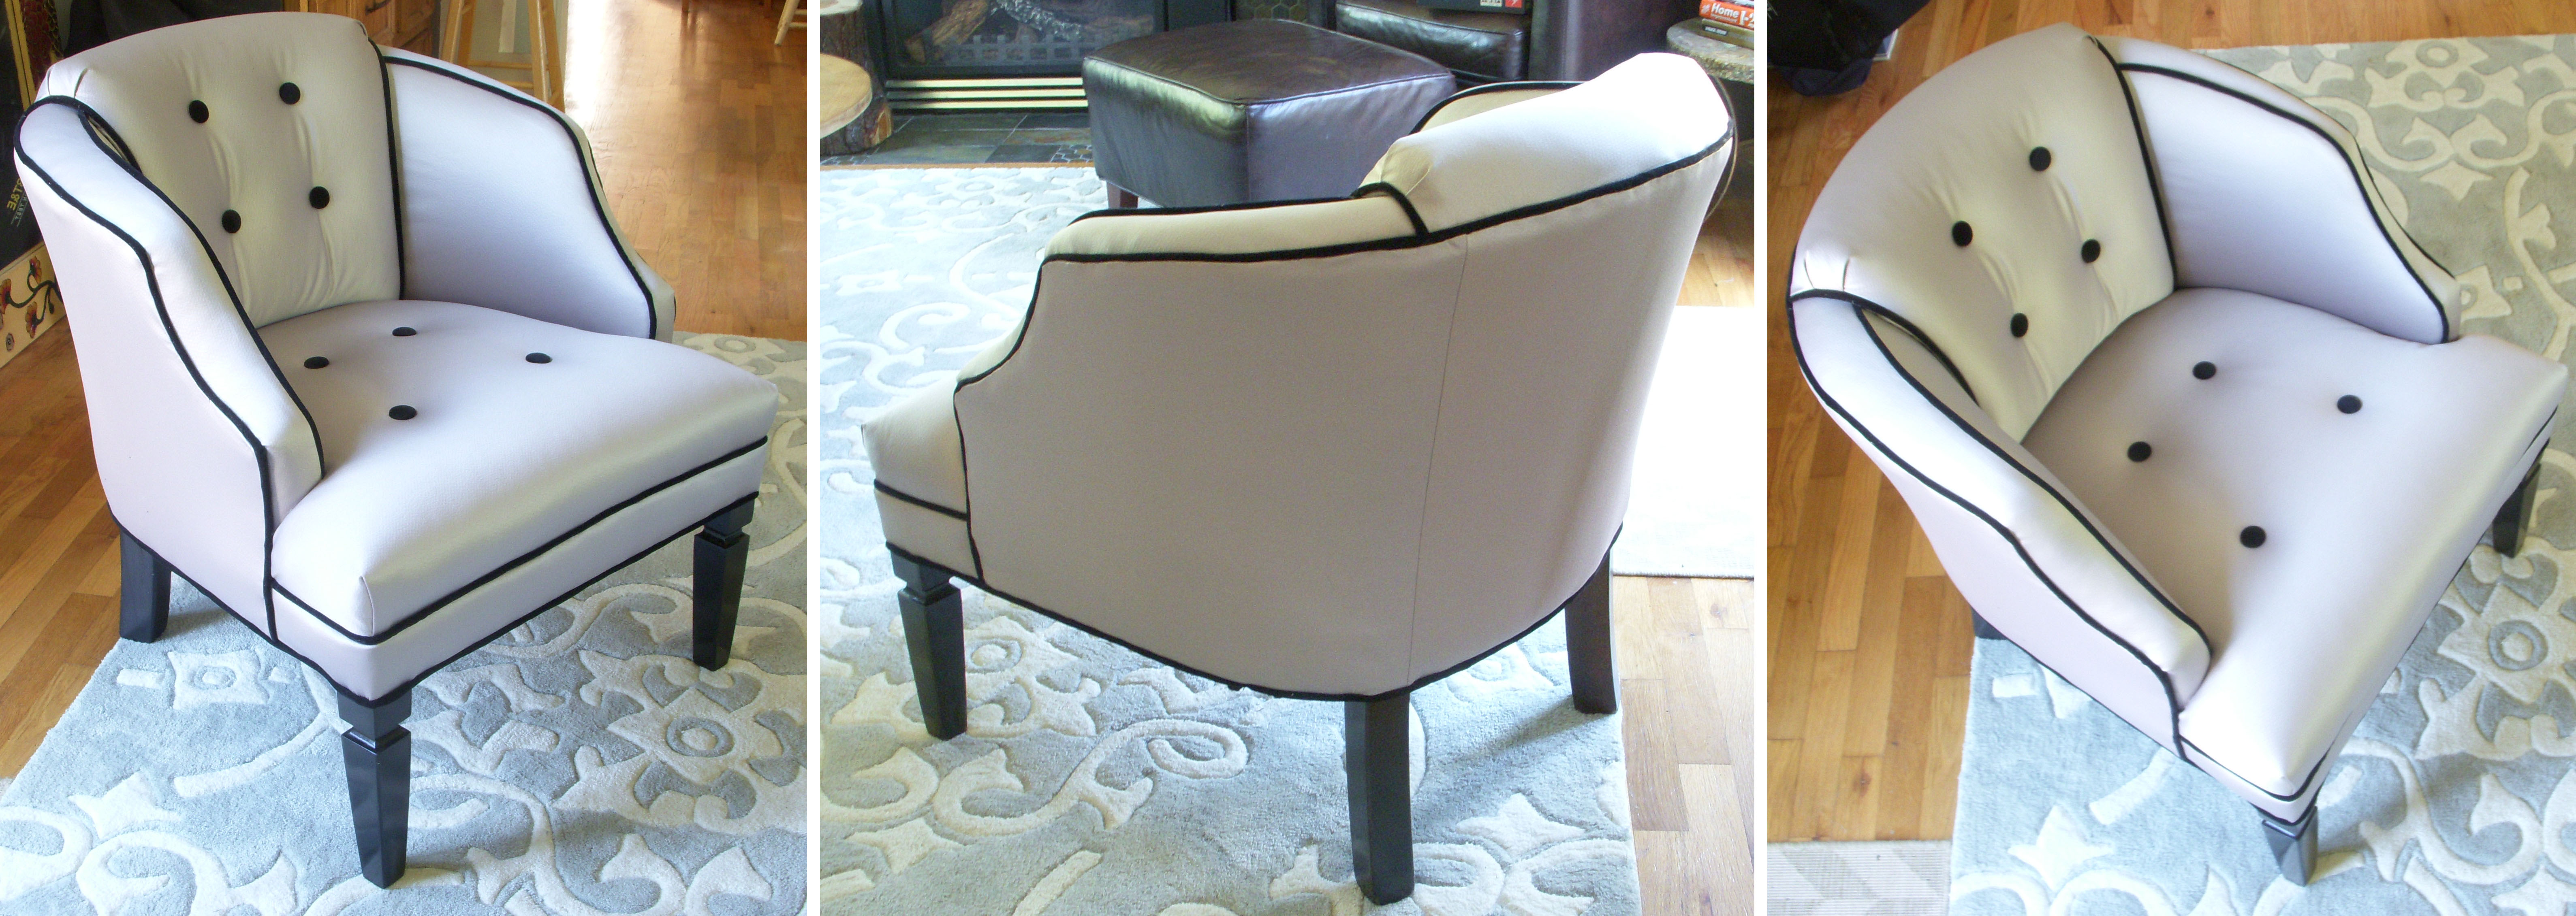
And then Voila! I turned the chair over walked it straight into the living room and have been admiring it ever since!


On to my next sad ugly chair!

My mom has a couple sad ugly chairs that she would probably pay you to reupholster…just saying
Someday I hope…I don’t think I’m at a level to get paid yet :)
Seiously, amazingly well done!!
LOVE IT Em!! Good job.
Nice job Em. I like the color combination!
ooooo! i love it! :D
Wow Em! Looks so good! You still taking classes from the pothead?
Thanks! @Marisol – I miss you! @Sarah – I miss you too! I took a class last year and I just finished the class. No pothead teacher, we got another who was his own kind of interesting.